
We are excited to share with our community something we have been working on: the Project Assistant is now available inside Class2Class! It will guide you through each step of creating a project, from describing your idea to building a full activity timeline, and provide suggestions that you can adjust at any time. Your experience as a teacher is at the forefront. The assistant is here to support you.
What Is the Project Assistant?
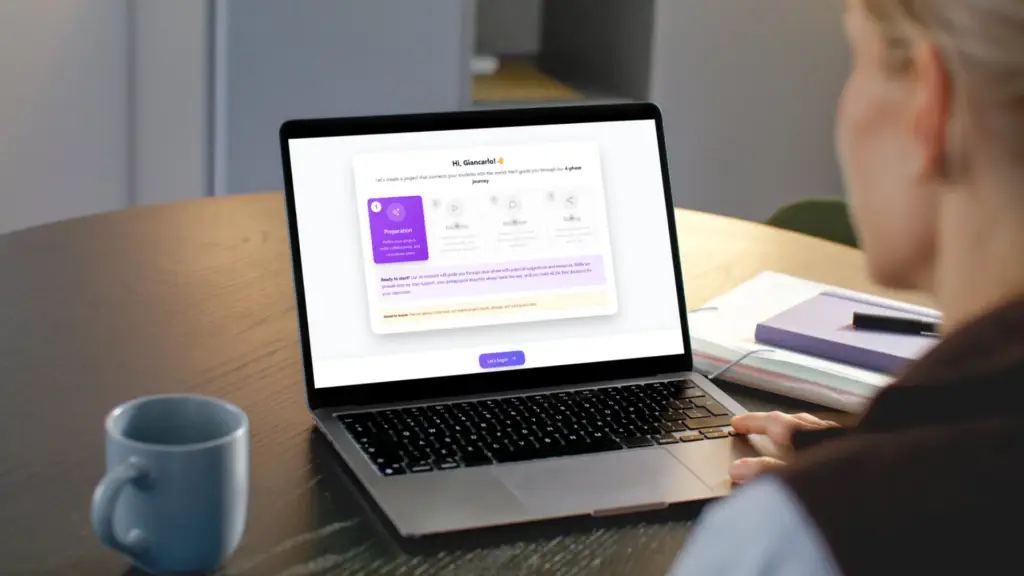
This Assistant is a step-by-step guide integrated directly into the Class2Class platform. When you start creating a new project, the Assistant works alongside you to develop each component—from defining your project concept to organizing activities in a timeline.
As you move through the flow, the assistant helps you define:
- The project idea and description — it suggests options based on what you share, and you choose what fits your class
- Learning objectives — proposed automatically, and fully editable by you
- Skills to develop — the assistant suggests relevant ones, and you can add your own
- Activities across a timeline — organized by phase, ready for you and your students
- Evaluation criteria — so assessment is clear from the beginning
After that, you have a complete project ready to share with a partner teacher and your students.
From Idea to Project: How the Project Assistant Works
The Assistant guides you through a clear, logical sequence. You start with the basics and gradually build a complete project structure.
This is the general workflow on how the assistant works:
- Set the context You choose whether the project will involve another class or run only within your own. You select the collaboration language, your students’ age range, and your preferred start time.
- Describe your project You share the topic and main goal. If you already have a lesson plan or outline, you can upload it so the assistant can use it as a starting point.
- Choose your project approach The assistant proposes three project directions based on what you shared. You choose the one that fits your class best — or ask for new options.
- Review learning objectives and skills The assistant suggests both. You confirm, edit, or expand them.
- Review the full activity timeline Activities are generated across the project phases: an intercultural icebreaker, main collaboration tasks, evaluation moments, and a final sharing activity. You can adjust them at any point.
- Define final settings You choose project visibility (open for collaboration or invite only) and your start date. Then your project is ready.
Once you complete these steps, your project is ready. You can invite partner teachers, enroll students, and begin the collaboration.
We prepared the video below to show you the step-by-step process.
The result: A project page ready to use.
Once you finish the setup, you land directly on your Project Page — already populated with everything you defined: learning goals, activity timeline, SDG alignment, and relevant children’s rights. The project is ready to run.
This is where the collaboration lives: where you and your students post updates, share evidence of learning, and interact with your partner class.
A few things have also been updated to make that experience clearer and more organized:
Student Groups and Group Boards
You can now organize your students into smaller groups. Each group has its own dedicated Board, where they can interact, post updates, and collaborate in a more focused space. This is particularly useful for larger projects with many participants.
Activities Organized in a Timeline
Instead of a general resource section, your project now has an Activities tab with a structured timeline. Each activity includes a description, duration, delivery format, and deadline. You can attach specific resources to each activity rather than managing everything at the project level.
Improved Board Experience
The shared Board — where teachers and students post images, videos, links, and documents — now includes a search function and a filter by participating schools. This makes it easier to follow each class’s contributions as the project progresses.
Simpler Project Completion and Certificates
When your project is finished, a single “Mark as complete” button initiates the certification process. Once reviewed and approved, certificates become available for download for all participating teachers.
How to Get Started with the Project Assistant
The Project Assistant is already available inside Class2Class. You do not need to wait or sign up for anything special.
Here is how to begin:
- Log in to your account at class2class.org
- Go to My Projects and click New Project
- Click Let’s begin to start the guided flow
- Move through each step at your own pace — your progress is saved automatically
- Once finished, go directly to your Project Page and invite your partner teacher or students
You do not need to have everything ready before you start. A topic, a student age range, and an idea of the duration is enough. The assistant will help you build the rest.
Ready to Get Started?
Now that you have a full picture of what the Project Assistant offers, we encourage you to give it a try. Share it with a colleague who might be interested, and invite your students to be part of the experience.
When your students join Class2Class, they enter a guided, safe space where everything is clearly explained. They can follow the project activities, share their work on the Board, and interact with their international peers — and you can focus on guiding the collaboration