
You did your first international project. Your students met a partner class, you survived the time-zone math, and something travelled between two countries that would not have travelled otherwise. Now you are imagining project number two, and there is one small worry: will this just be a slightly louder version of what we already did? The good news is that international collaborative learning does not need to grow louder on the second project. It needs to grow clearer. This article walks through three moves teachers use after their first cycle — design real roles, raise the product, and tighten the close. None of them ask for more hours; all of them ask for more deliberate planning.
If you have not yet looked back on project number one, the reflection checklist after your first international project is the gentlest place to start. The three moves below assume that a small pause is behind you.
Design real roles for international collaborative learning
The biggest difference between a first project and a strong second one is small. Students stop “working in groups” and start “working in roles.” On project number one, most teachers form teams and let work emerge. On project number two, you write a one-page role card before the project starts, and the work follows the cards.
What goes on a role card
What goes on a role card? Two layers. The first is functional — researcher, translator, editor, presenter, time-keeper, designer. The second is collaboration-specific — the bridge to the partner class, the decision-recorder, the question-asker. Each role has one deliverable the student owns. International collaborative learning gets sharper when every student knows what they will hand in by Friday, and what their counterpart in the partner class is expecting from them.
A real example. In K-pop in the Classroom, teacher Nassim Mia in Bangladesh spent the entire first week on team formation and role definition. Only then did research begin. After the cards were set, the teachers stepped back to guide rather than direct, and the multinational teams started running themselves. The collaboration was not louder than the first project — it was clearer.
How roles unlock student agency
Role design also connects to two of the 8 C2C competencies: Collaboration & Teamwork and Adaptability & Leadership. The same move lines up with what the OECD Learning Compass 2030 calls student agency — the capacity to set goals, take action, and own the outcome. When a student knows their role, agency is easier to find. The competencies framework for collaborative projects is not a checklist to grade; it is a lens for noticing what students are doing well.
A practical takeaway for project two
Here’s a practical takeaway you can put into action this term: build a single role card for every student, on its own page, that captures three things — one functional role (what they’re producing, like Researcher, Designer, or Builder), one collaboration role (how they show up for the team, like Facilitator, Time-Keeper, or Bridge-Builder), and one concrete deliverable with a clear standard for “done.” Write these cards before the project launches, while you still have the headspace to think about each student individually.
Once the project is underway, resist the urge to keep adjusting things. Edit a card only once during execution, and only if the work itself demands it — a student outgrows their role, a team rebalances, or a deliverable shifts because the inquiry took an unexpected turn. That single page is the cheapest, highest-leverage upgrade you can give your second project: it turns “group work” into shared accountability and gives quieter students a clear lane to contribute without having to negotiate for space.
Raise the product: from presentation to artefact
On most first projects, the final product is a presentation. The class shares slides with the partner class, everyone claps, and the project closes. That is a fine ending for a first project. For project number two, the move is to end with an artefact instead — something the world can use after the project ends.
What counts as an artefact
What counts as an artefact? A debate position paper. A multilingual campaign. A co-authored guide. A piece of student-led research. A designed prototype. A community proposal. The audience grows from “the partner class” to “anyone who would benefit from this.” International collaborative learning takes a step up when the product has somewhere to go.
Two examples make the move concrete. In Should Rivers Be Connected?, students aged 10 to 25 across India, Vietnam, Russia and seven other countries built evidence-based positions on water infrastructure. The artefact was the debate itself, with research behind every claim, and a public record that other classrooms could read. In the Global Water Conservation Challenge, teacher Jhansi connected her classroom in India with classes in Malaysia and Myanmar around one shared question. A textbook chapter turned into co-produced research that three communities could use.
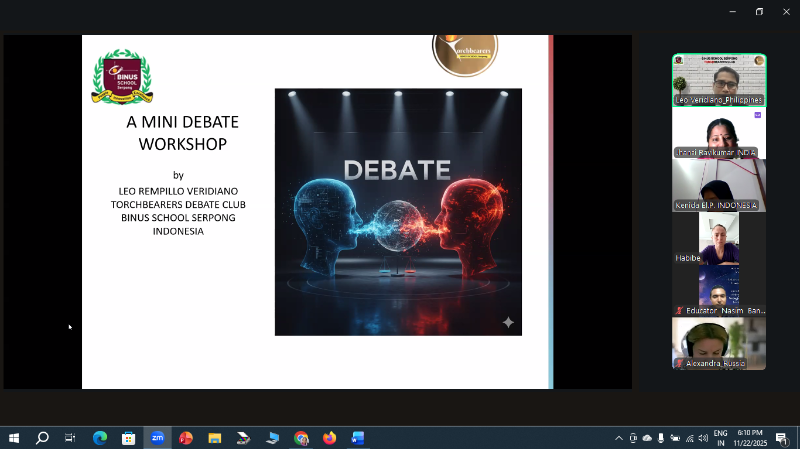
Teachers during the videocall session on Should Rivers Be Connected? Debate.
This is also where the Create Solutions approach in the C2C educational framework becomes useful. Design Thinking layers onto project-based learning, and students move from describing a problem to proposing a response to it. The artefact gives the work somewhere to go after the final video call ends. Many global collaboration projects for teachers stall here, not because the idea was weak, but because no one named the audience early.
Name the audience before the project starts
A practical takeaway: before launching project number two, write one sentence that describes the artefact and the audience it is for. Teachers don’t always get to choose their collaborations — often you say yes to whatever opportunity arises, and that’s part of the craft. Within that reality, naming a real audience beyond “the partner class” — even a small one — changes everything about how the students plan, which is exactly the point.
Tighten the close: Reflection and Dissemination
Most first projects run thin in the final two phases. When the term is busy, Definition and Execution feel urgent and absorb most of the available time, while Reflection and Dissemination start to feel optional — the parts you’ll get to “if there’s time left.” On project number two, the close is the easiest place to grow: the structure is already familiar, the students are warmed up, and a little extra investment at the end produces a disproportionate jump in quality.
Reflection: evidence at the group level
Reflection moves from “what did we learn” to evidence selection at the group level. Students choose the artefacts that best show their growth as a team. The teacher reads the evidence in aggregate — group-level, not individual grades. This is also why international collaborative learning works as collaborative work, not as a graded contest: the unit being noticed is the team, not the test score.
Dissemination: sharing outward
Dissemination moves from sharing inward — between the two partner classes — to sharing outward, with the audience named back at the start. That outward audience might be a parent newsletter, a school assembly, a post on the school’s social channels, a community organisation, or a school in a third country. Whichever audience the teacher can reach is the right one. It does not have to be huge — it just has to sit beyond the two classrooms that made the work. That step outward is what turns the artefact into something made for someone, and it is what gives the closing phase its weight.
A real example. In Celebrate Women in STEM Across Borders, teachers Jhansi in India, Oksana in Ukraine, Paola and Mily in Colombia organised a single live session that brought three classrooms into one room to celebrate women in science. The Dissemination act was simple, low-budget, and unforgettable — and it took 60 minutes.
A second project is a different shape, not a bigger one
If the first project was a window into another classroom, the second can be a door, a debate, or a co-authored guide. The three C2C project approaches — Explore Cultures, Explore Global Challenges, and Create Solutions — exist so that each project can be a different shape, not a louder version of the last. International collaborative learning grows when the perspective shifts, not when the scope inflates.
The most-borrowed move from teachers returning for project two is small: keep one partner, change one variable. Same partner, new topic. Same topic, new artefact. Same artefact, new audience. One change at a time is enough to make the second project feel different — which is the whole point. The students who lived through the first project are not the same students who started it, and the second project is a chance to honour what they already know how to do.
Try it this week
Open the Project Creation Assistant with three ingredients already in mind — one curriculum topic, one UN Sustainable Development Goal, and one returning or new partner — and let it draft a brief you can edit. The platform is free, the assistant is a first draft, and your teacher’s judgement decides what stay.
References
- Class2Class — What to Do After Your First International Project: A Reflection Checklist
- Class2Class — Global Collaboration in Action: K-pop in the Classroom
- Class2Class — Collaboration in Action: Should Rivers Be Connected?
- Class2Class — Global Collaboration in Action: Global Water Conservation Challenge
- Class2Class — Collaboration in Action: Celebrate Women in STEM Across Borders
- Class2Class — Designing Global Projects: Four Phases and Three Approaches
External sources
- Brown, T. (2008). Design thinking. Harvard Business Review, 86(6), 84–92. https://hbr.org/2008/06/design-thinking
- Larmer, J., & Mergendoller, J. R. (2015). Gold Standard PBL: Essential project design elements. Buck Institute for Education (PBLWorks). https://www.pblworks.org/what-is-pbl
- OECD. (2019). OECD Future of Education and Skills 2030: OECD Learning Compass 2030 — A series of concept notes. OECD Publishing. https://www.oecd.org/education/2030-project/