Introduction
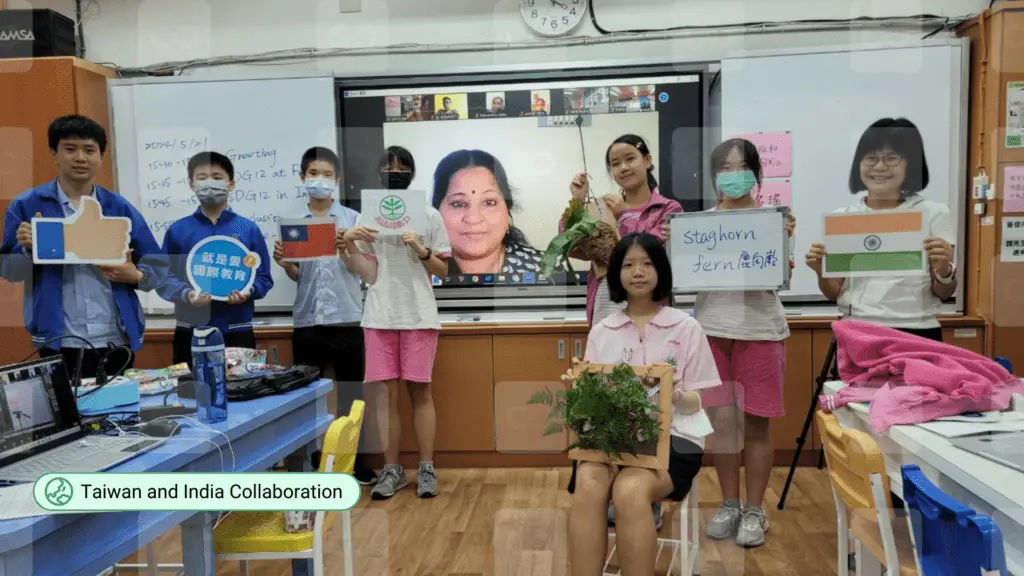
Are you ready start your first international collaboration project and transform your students into global citizens? Class2Class.org, the leading global collaboration platform for teachers, empowers educators like you to create meaningful, cross-cultural classroom projects that foster 21st-century skills and contribute to the United Nations Sustainable Development Goals (SDGs). In this article, we’ll guide you through the process of starting your first international collaboration project on the Class2Class.org platform.
Understanding the Class2Class.org Learning Journey:
Before diving into project creation, it’s essential to understand the types of collaboration of the Class2Class.org learning journey:

- Get to Know Each Other: This type of collaboration emphasizes the importance of building global connections and understanding different cultures. Through activities designed to break down barriers and promote empathy, your students will lay the foundation for successful collaboration.
- Working Towards the SDGs: By participating in projects that address the United Nations Sustainable Development Goals (SDGs), your students will have the opportunity to make a tangible difference in the world. They’ll learn how their actions can contribute to creating a more sustainable and equitable future for all.
- Create Solutions to Real Problems: Encourage your students to think critically and creatively as they tackle real-world challenges. Projects at this level foster innovation and problem-solving skills, preparing students for the complexities of the modern world.
Setting up your project
Are you ready start your first international collaboration project? Follow these simple steps to create your first international collaboration project on Class2Class.org:
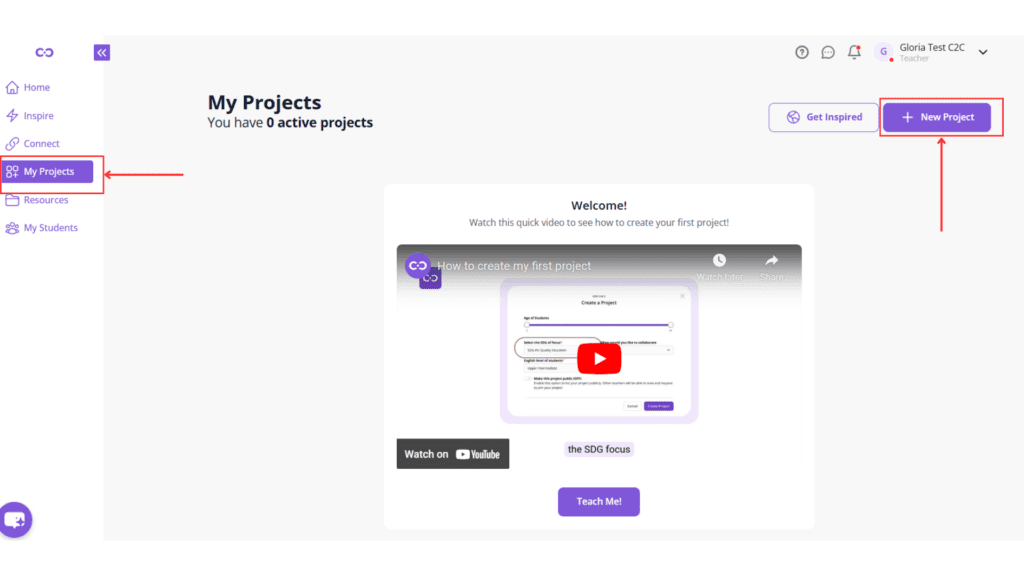
- Navigate to the “My Projects” Section: Log in to your account and click on “My Projects” menu to access the project creation hub.
- Click on “New Project”: Take the first step towards global collaboration by clicking on the “New Project” button.
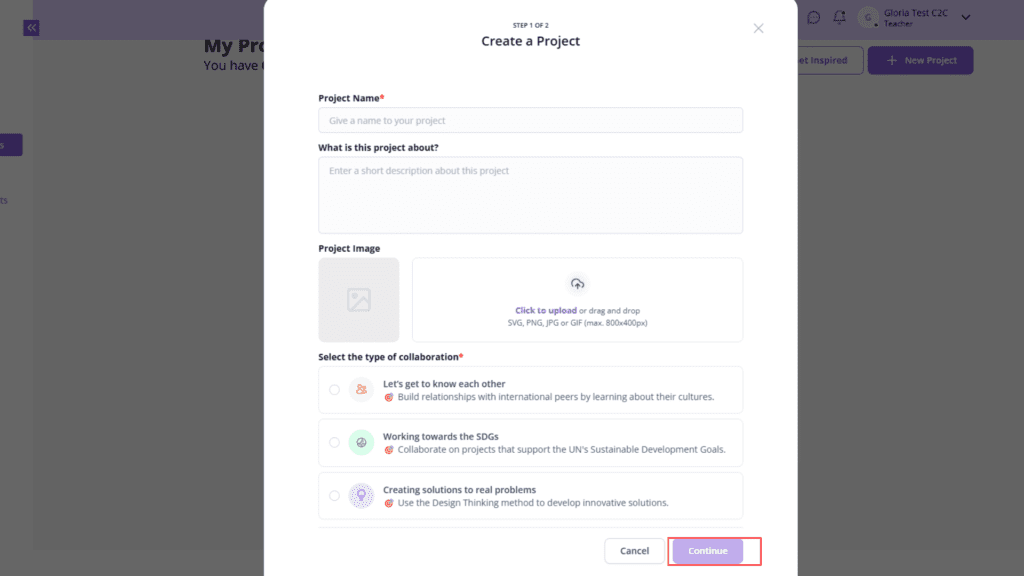
- Fill in the Project Details: Fill in the Project Details: Craft a compelling title, select the appropriate type of collaboration, and provide a detailed description of your project’s objectives and guidelines. You can also add a cover photo to your project. This makes your project more visually appealing.
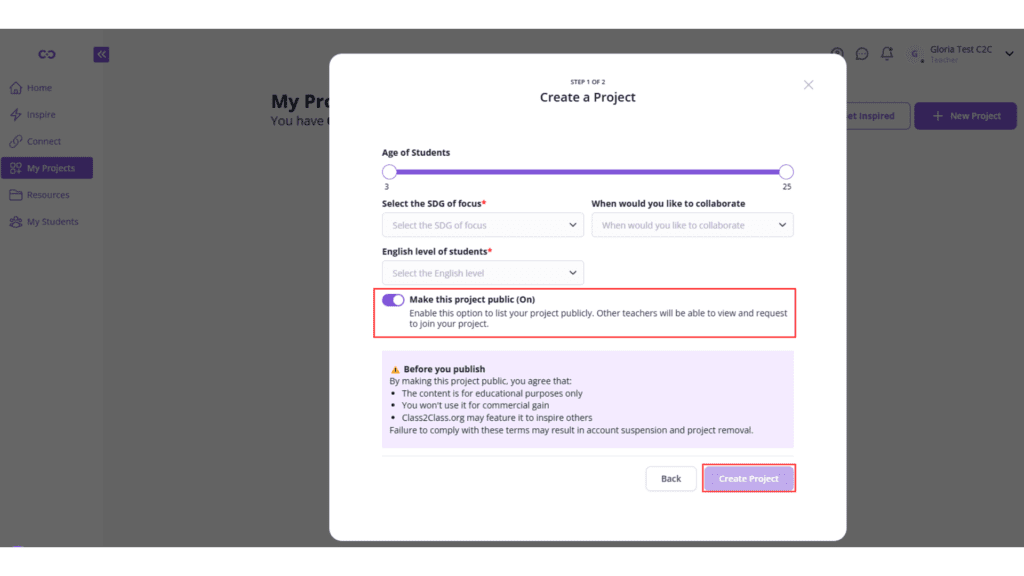
4. Add more details: Click Next to proceed to the next step in creating your project. Here you can select the age of your students when you plan to start your project and click “Make it public” if you want this project to be listed in our “Inspire” section where other teachers can request to join your project.
5. Manage Your Project: Dive into your project’s dedicated page, where you can invite participants, share resources, communicate with your team, monitor progress, and celebrate success by issuing certificates of completion.
Exploring your project page
Your project page is the hub for all collaboration activities. Let’s explore the key sections and how they can benefit your project:
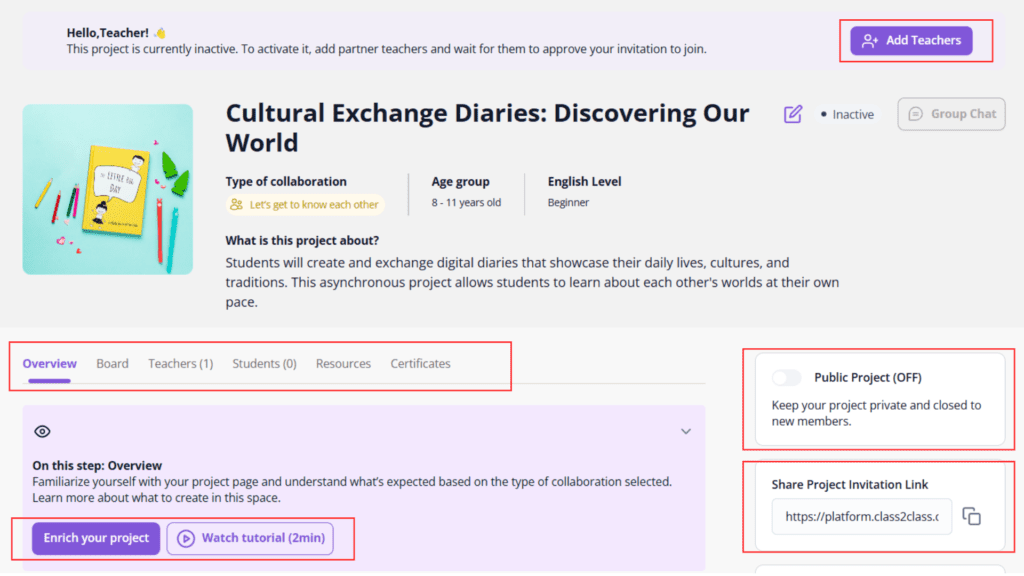
- Overview: This section provides a summary of your project’s goals and objectives. Use it to communicate your vision and keep your collaborators on the same page.
- Teachers: Invite teachers from your contact list created in the “Connect” section of the menu to join your project. You can also accept requests from other teachers to join your project in this section.
- Students: Invite students who are already enrolled in your “My Students” section of the menu to join this collaboration.
- Resources: Organize and share project materials such as lesson plans, worksheets, and multimedia content in this centralized library. Ensuring that everyone has access to the resources they need is critical to successful collaboration.
- Board: The interactive “Board” tab is perfect for fostering communication and collaboration among all project participants. Encourage students and teachers to share updates, ask questions, and provide feedback to create a vibrant and engaging learning community.
- Certificate: Celebrate your students’ accomplishments by awarding certificates upon project completion. This recognition builds motivation and serves as a tangible reminder of their global learning experience.
It’s important to note that when you first create a project, the first step is to add a teacher; this action allows your project to move from an inactive status to an active one. To do this, you can go to your “Teachers” tab and add them from your contact list, or if you don’t have any matches yet, you can “make your project public” for other teachers from the community to join, this option is always available in the “Project Public (ON/OFF)”. You can also share the link to your project and invite other colleagues to join.
Conclusion
By leveraging the power of Class2Class.org, you’ll not only provide your students with a life-changing educational experience but also contribute to building a more connected, understanding, and sustainable world.
Don’t wait another moment to make a difference in your student’s lives and the world at large. Start your international collaboration project today on Class2Class.org and witness the incredible transformation as your students grow into the global leaders of tomorrow. The journey to global collaboration and cultural understanding begins with a single click – join the Class2Class.org community now and let’s create a brighter future together!

